The Sims 4 Building Tutorials:
Advanced: Split Levels, Lofts, and Dormer Windows
by Norma Blackburn
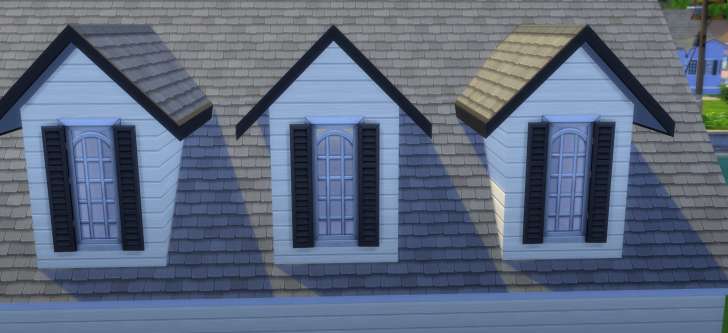
Once you are comfortable with basic building, why not try your hand at a few more advanced building techniques.
Split Levels and Lofts
Different levels in a build can be an interesting feature and are not too hard to do.
To make a split level or a sunken room, the rest of the house needs to be on a foundation, so let's start with building a rectangle room and lifting it up with a foundation. Now divide this into two rooms with a wall. Once you have two rooms, you need to use the sledgehammer tool and remove the floor from one room. This room will be the lower room. At this point, if we remove even one piece of wall to add stairs down to this lower level, it will no longer be seen as a room and the ceiling will be removed. Instead, we will replace some or all of the room with a fence.
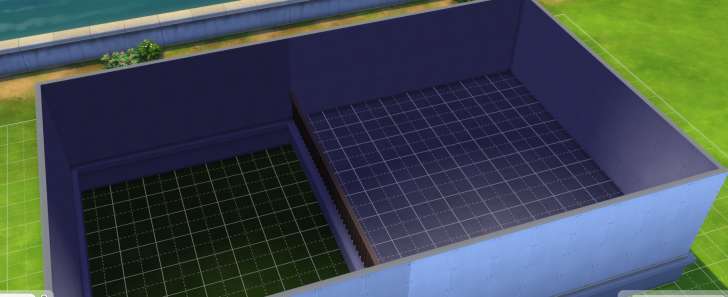
Click to Enlarge. Replace the wall between the two rooms with a fence
Now we can decorate both rooms how we like. The lower room will not have a floor, so you will need to choose a floor covering and drag it out over the area. Note that if you move the house later, the flooring will stay behind as it is not really part of the room. The default foundation has a ridge around the top, so you may want to select a different foundation type to get a smooth wall in the lower room. Add stairs to the upper level. You can add windows to the sunken room, but they can only be placed on the wall area and not the lower foundation part of the wall. Doors cannot be placed in the foundation part of the walls, so entry to the sunken room has to be via stairs.
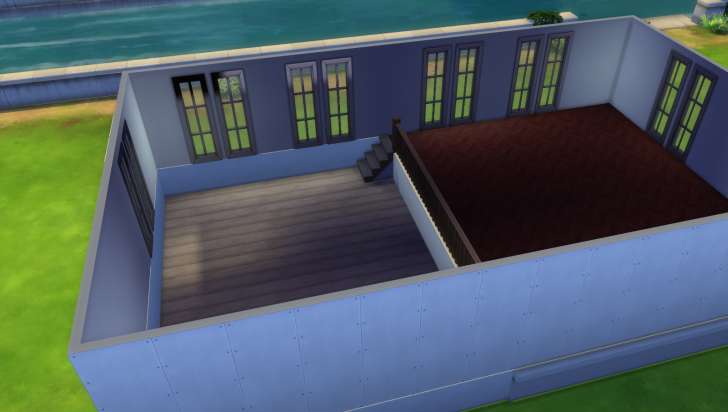
Click to Enlarge. Windows will let light into the lower area
The sunken room can be anywhere you want in the house. Simply build a room where ever it needs to be and remove the floor from that room and continue in the same way as before. Remember not to remove the wall, but replace it with a fennce.
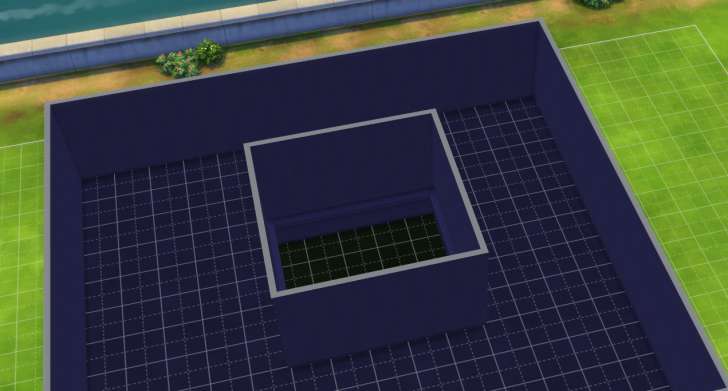
Click to Enlarge. You can remove the floor from a room anywhere in the house to create a sunken room
Lofts
Lofts are similar to split levels, but don't need to be on a foundation and are usually two storeys high.
Let's build a simple one bedroom loft to learn the basics. Start with a rectangle room and build a second level the same size. We need to divide the upper room in two but instead of just adding a wall straight from one side to the other, we will also have a cut-out for the stairs. If the walls are the short walls, this cut-out needs to be three squares.
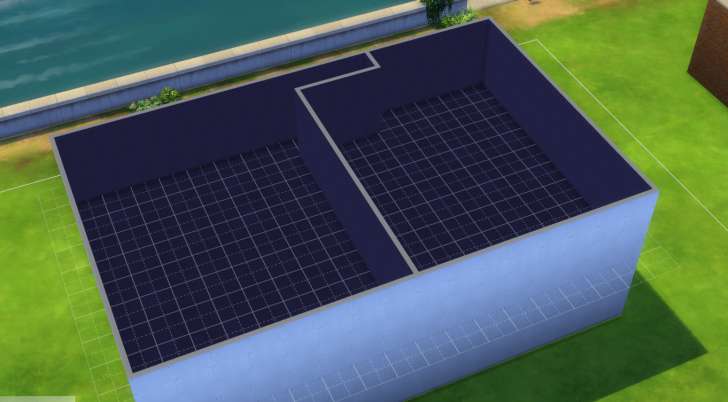
Click to Enlarge. The beginning of a loft
Replace the dividing wall upstairs with a fence and then remove the floor from the room that includes the little bit for the stair well.
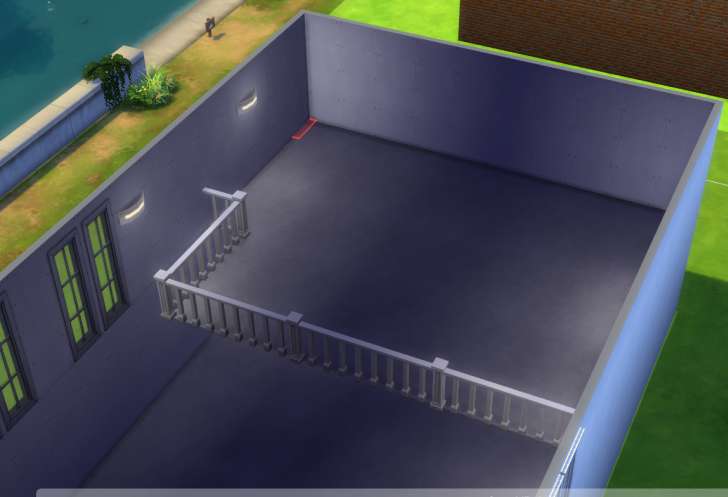
Click to Enlarge. The loft before adding stairs
Add the stairs up to the loft. Remember to put the stairs through the bit of fence at the top. If you remove the fence the room area with no floor will no longer be seen as a room and the ceiling will be removed.
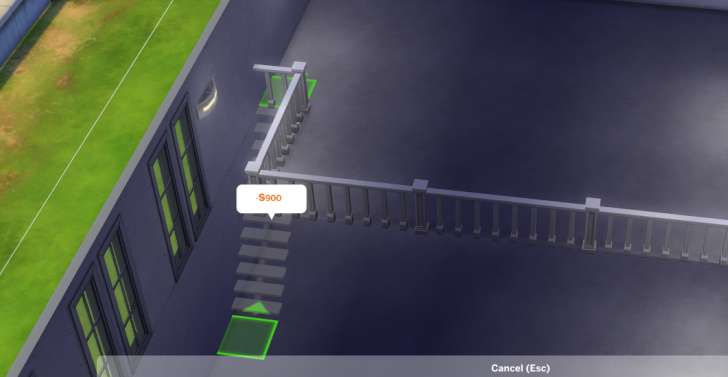
Click to Enlarge. Add the stairs to the loft
You can now add doors and windows downstairs and decorate as you wish.
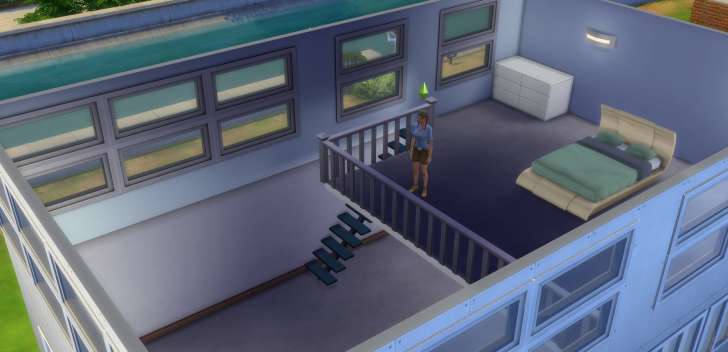
Dormer Windows
Dormer windows are usually associated with attic rooms. They let light into an otherwise dark area enclosed within the roof of a house. Let's take a closer look at the parts needed to build a basic dormer window.
Start by building the lower floor of the house. This can be any size, but ideally, it should be at least three squares wide and at least nine squares deep. Go up a level and build another room the length of the first room, but starting three squares in from the front and ending three squares from the back. This room can end more than three spaces from the back if you don't want back dormer windows, but it needs to be at least three squares deep.
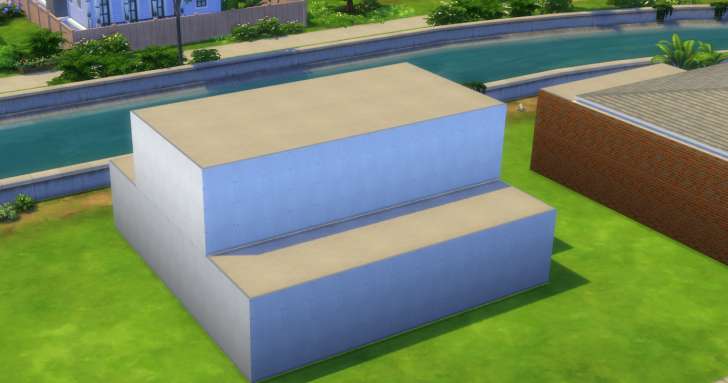
Now build a small room the size of the dormer onto the front of the upper room. This can be any width and can come out one, two or three squares. How far you come out from the main room will determine how much space you will have for the front window. Remove the wall between the dormer room and the main room. Here I have built a few different sized dormers to show how they change the look.
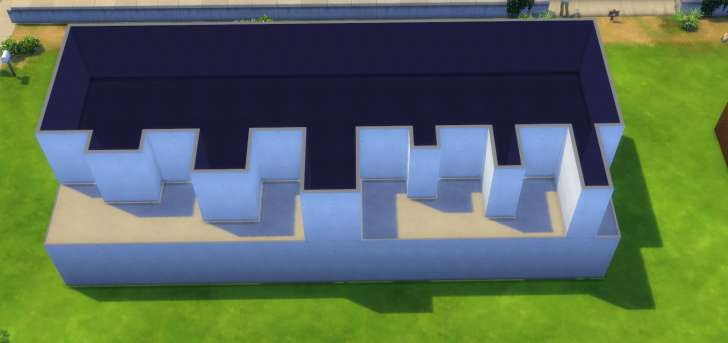
Add a gable roof on the upper level but not out over the dormers. Make it so the gable ends are at the sides of the house. Now pick the half gable tool and place it on the lower floor at the front with the slope of the roof matching the roof on the upper floor.
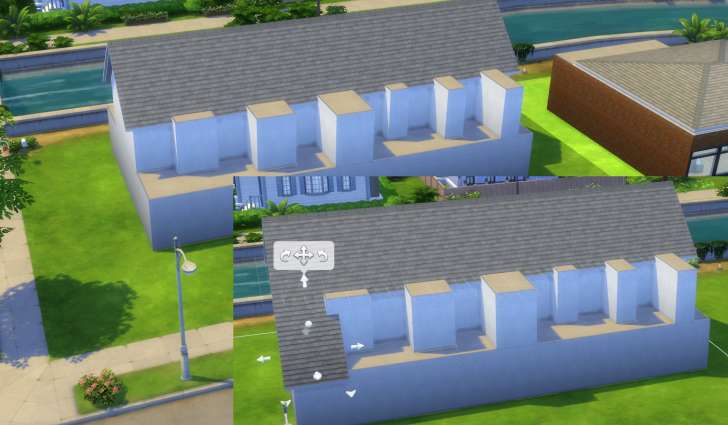
With this piece of roof selected, grab the arrow handle and drag it to the other end of the house. Don't worry about going through the dormers, when you look at that level, the rooms will have no roof pieces through them. Grab a full gable roof piece and place it on top of each dormer so that the gable end is facing the front. On the narrow dormers, you will need to pull the roof in to fit the smaller size. On the dormers that come out further, you will need to grab the back arrow handle and extend the gable roof section so that it goes into the main section of roof and you can no longer see the back end.
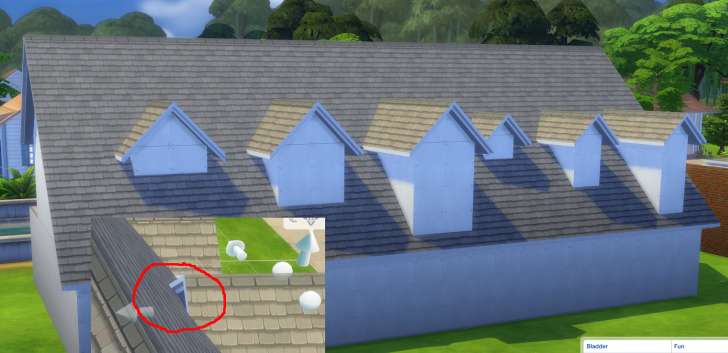
Click to Enlarge. make sure the dormer roof pieces extend into the main part of the roof
Now you can add windows to the dormers. How wide they are and how far out they come will limit what windows you can use, but using the moveobjects cheat will give you more choices.
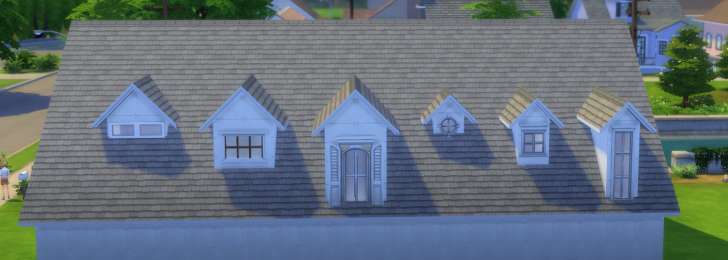
Click to Enlarge. None of these windows needed the moveobject cheat
For wider dormers, consider using a very low half gable roof for a different look.
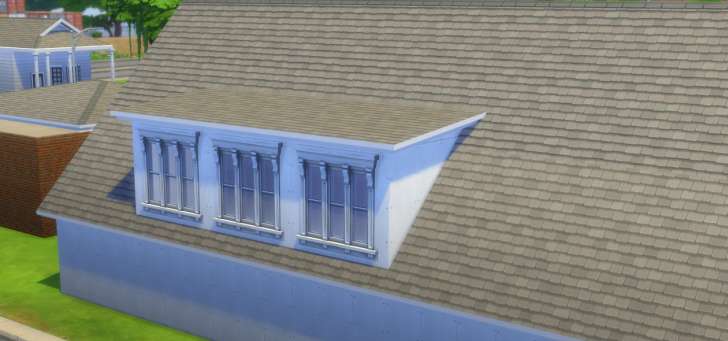
You don't have to have dormers on both front and back of the house. It could be finished with just a full length of half gable to match the front or the roof might not extend as low as it does at the front. You may even go for a combination of the two.
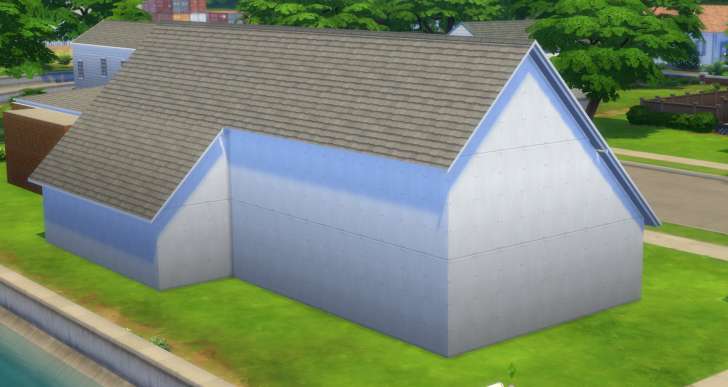
Note that although I have said that the areas where the half gables go need to be three squares deep, they can be smaller or larger, but matching up roof sections becomes a lot harder when the size is changed.
Learn More
- Cheats - Gameplay, testing, and building cheats
- Careers - All job levels, promotions and rewards
- Skills - All skills, ideal moods, and their benefits
- Expansions, Stuff, and Game Packs - All Sims DLC Features
- Babies - Caring for an infant in The Sims 4
- Children - School grades and child skills
- Tips - Gameplay tips and tricks
- Sims' Needs - Caring for your Sims
- Money - Ways of making money in The Sims 4
- Building Tutorials - Learn tricks to make your houses look great.
- Get to Work: Open for Business - running a business
- Emotions - Getting your Sims in the right mood
- Relationships and Weddings
Warning: require(/var/www/test.carls-sims-4-guide.com/comments/includes/commentics.php): failed to open stream: No such file or directory in /var/www/test.carls-sims-4-guide.com/tutorials/building/split-levels-lofts.php on line 177
Fatal error: require(): Failed opening required '/var/www/test.carls-sims-4-guide.com/comments/includes/commentics.php' (include_path='.:/opt/remi/php72/root/usr/share/pear:/opt/remi/php72/root/usr/share/php:/usr/share/pear:/usr/share/php') in /var/www/test.carls-sims-4-guide.com/tutorials/building/split-levels-lofts.php on line 177


